Introduction
When your Xbox Series X’s HDMI port malfunctions, your gaming experience grinds to a halt. Instead of letting this ruin your gaming plans, understanding how to troubleshoot and fix this issue at home is empowering. With this guide, you will learn to identify and repair common HDMI port problems, helping you return swiftly to your gaming adventures.
Understanding HDMI Port Issues
Before you begin the repair process, it is essential to understand the signs and causes of HDMI port problems. Recognizing the symptoms can lead to a more accurate diagnosis, saving both time and effort.
Common Symptoms of HDMI Problems
- The TV or monitor displays no signal even though the console is on.
- The image on the screen flickers or seems distorted.
- Connectivity interruptions occur during gameplay.
- Physical damage is visible on the HDMI port.
Root Causes of HDMI Port Malfunctions
- Regular plugging and unplugging of cables leads to wear.
- Dust accumulation obstructs port connections.
- Accidental force on the cable causes internal damage.
- Rare manufacturing defects can also arise over time.
By understanding these factors, you can better prevent future HDMI port issues and maintain a high-performing console.
Preparing for the Repair
Once you’ve identified HDMI port issues, preparation becomes the next step in the process. Ensuring you have the necessary tools and a safe working environment is crucial for a successful repair.
Tools and Materials Required
Gather the following tools to facilitate the repair:
– Precision screwdriver set
– Soldering iron with solder
– Replacement HDMI port (if needed)
– Anti-static wrist strap
– Cleaning brush or compressed air
– Multimeter (optional for electrical testing)
Safety Precautions to Consider
Safety must remain a priority during this repair process:
1. Ensure the Xbox Series X is turned off and unplugged from power.
2. Wear an anti-static wrist strap to protect the console’s internal components.
3. Use a well-organized, clean workspace with adequate lighting.
4. Keep liquids away from your console to avoid spills.
These precautions will help protect both you and your console during the repair.
Step-by-Step Guide to Fixing the HDMI Port
With your tools ready and safety measures in place, you can now proceed to the actual repair process. This detailed guide will help you address HDMI port issues efficiently.
Disassembling the Xbox Series X
- Use the necessary screwdriver to remove the screws on the console’s exterior casing.
- Carefully lift off the external casing, keeping track of where screws belong.
- Gently remove the metal shielding to expose the console’s motherboard.
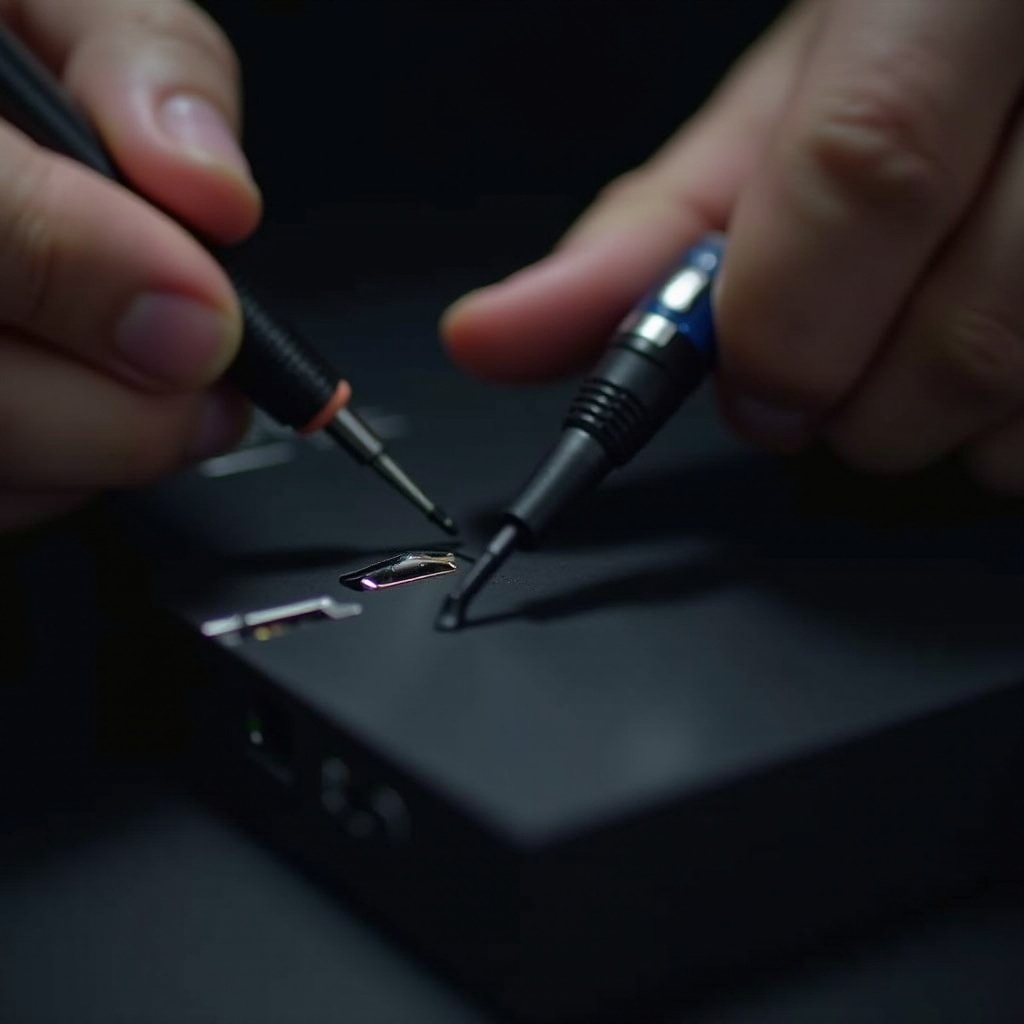
Inspecting and Cleaning the HDMI Port
- Inspect the HDMI port for signs of damage or dirt.
- Clean the port gently using a brush or compressed air.
- Verify the condition of the pins and connectors inside the port.
- Use a multimeter to check electrical continuity if necessary.
Repairing or Replacing the HDMI Port
- If solder joints appear loose, carefully re-solder them.
- If the port is damaged, de-solder and replace it with a new one.
- Ensure all connections are tight and secure to prevent further issues.
Reassembly and Testing
After completing the repair, the reassembly of the console and subsequent testing are crucial to confirm your success.
Putting Your Console Back Together
- Reattach the metal shielding, securing it with the appropriate screws.
- Replace the external casing, ensuring it is firmly tightened and secure.
- Make sure no loose components remain inside the console.
Testing the HDMI Connection
- Reconnect the HDMI and power cables to your Xbox Series X.
- Power on the console and connect it to your TV or monitor.
- Test a few games to confirm stable and uninterrupted display output.
Seeking Professional Help
DIY repairs are rewarding but may not always suffice. It is important to know when to seek professional assistance, especially if issues persist.
When DIY Solutions Aren’t Enough
- Some problems may persist despite thorough troubleshooting.
- Complex issues involving internal components warrant expert evaluation.
- Professional repairs often come with warranties, providing peace of mind.
Prevention Tips and Maintenance
Ensuring your HDMI port remains functional after repair requires regular maintenance and preventive measures.
Tips to Prevent Future HDMI Issues
- Avoid regular disconnection and reconnection of your HDMI cable.
- Check and clean the HDMI port periodically.
- Handle cables gently to prevent undue stress or bending.
- Use a surge protector to shield the console from power surges.
Frequently Asked Questions
What are the common signs of an HDMI port problem on the Xbox Series X?
Common signs include a blank display, flickering or distorted images, and visible physical damage.
Can all HDMI port issues be fixed at home?
Many HDMI port issues can be resolved at home, but complex or severe damages may require professional repair.
How much does it typically cost to have a professional repair an Xbox Series X HDMI port?
Professional repair costs range from $80 to $150, depending on damage extent and service provider rates.